1. Turn Old T-Shirts into Reusable Shopping Bags
Materials Needed: Old t-shirts, scissors, needle and thread or a sewing machine.
Instructions:
Select a t-shirt that you no longer wear but is still in good condition. Ideally, choose one made of sturdy fabric to ensure the bag is durable. Lay the t-shirt flat on a surface and cut off the sleeves. You can cut along the seam for a clean finish or just above the seam to leave a bit of the sleeve attached, which can reinforce the handles. Cut out the neckline to create the opening of the bag. You can make it a wide scoop or a smaller cut, depending on your preference. Turn the t-shirt inside out and sew the bottom hem shut. Use a straight stitch if sewing by hand, or a zigzag stitch if using a sewing machine for added strength. Make sure to sew it securely to prevent any openings. Turn the bag right side out. If you want, you can reinforce the handles by sewing a straight line along the edges of the shoulder straps. Your reusable shopping bag is now ready to use!
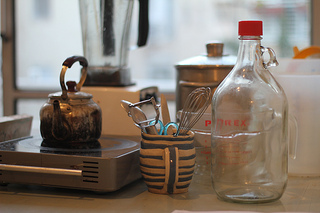
2. Repurpose Glass Jars into Chic Storage Containers
Materials Needed: Glass jars, spray paint, labels, and adhesive.
Instructions:
Collect glass jars from your kitchen, such as those from pasta sauces, pickles, or jams. Remove any labels by soaking the jars in warm soapy water and scrubbing off the residue.Thoroughly dry the jars. If you want to paint the lids, lay them on a protected surface and apply an even coat of spray paint. Allow the paint to dry completely, and add a second coat if necessary. Decide what you’ll store in the jars, such as spices, grains, craft supplies, or bathroom essentials. Create labels for each jar using adhesive labels or masking tape and a permanent marker. Apply the labels to the jars. For a more polished look, consider using a label maker or printing custom labels on sticker paper.Fill the jars with your items and screw on the painted lids. Arrange them on a shelf or in a pantry for easy access and a stylish, organized display.
3. Transform Wine Corks into a Stylish Bulletin Board
Materials Needed: Wine corks, a picture frame, hot glue gun, and backing board.
Instructions:
Gather wine corks from your collection. If you don’t have enough, ask friends or family, or purchase them from a craft store. Choose a picture frame that fits the size of the bulletin board you want to create. Remove the glass and backing from the frame. Cut a piece of backing board (such as cardboard or foam board) to fit inside the frame. This will be the base for gluing the corks. Arrange the wine corks within the frame to create your desired pattern. You can align them horizontally, vertically, or in a herringbone pattern. Ensure they fit snugly. Using a hot glue gun, secure each cork to the backing board. Apply glue to the bottom and press the cork firmly into place. Continue until all corks are glued down. Once the glue is dry, insert the backing board with the corks into the frame. Hang your stylish bulletin board in your kitchen or office for a unique and functional display.
4. Create a Garden Planter from an Old Dresser Drawer
Materials Needed: Old dresser drawer, sandpaper, paint, stones, potting soil, and plants.
Instructions:
Find an old dresser drawer that you no longer use. Remove any hardware and sand down rough edges and surfaces to prepare for painting. Choose a paint color that complements your garden or patio decor. Apply a coat of paint to the drawer, inside and out. Allow it to dry completely, and add a second coat if needed for full coverage. Line the bottom of the drawer with a layer of stones or gravel for drainage. This helps prevent water from pooling at the bottom and rotting the roots of your plants.Fill the drawer with potting soil, leaving a few inches of space at the top. Gently press down the soil to remove air pockets and create a stable base for your plants. Plant your chosen herbs, flowers, or succulents in the soil. Arrange them as desired and add more soil if needed to cover the roots. Water the plants thoroughly and place the drawer planter in a sunny spot in your garden or on your patio.
5. Make a Cozy Pet Bed from an Old Suitcase
Materials Needed: Old suitcase, pillow or cushion, fabric, and hot glue.
Find an old suitcase that you no longer use. Clean it thoroughly and remove any unwanted hardware. Ensure that the suitcase is sturdy and opens easily Choose a soft fabric that complements your home decor and your pet’s comfort. Measure the interior of the suitcase and cut the fabric to fit, leaving some extra for securing. Use a hot glue gun to attach the fabric to the inside of the suitcase. Start at one end and work your way around, smoothing out any wrinkles as you go. Ensure the fabric is securely glued down to create a cozy lining.Place a pillow or cushion inside the suitcase to provide a comfortable base for your pet. You can use an old pillow or make a custom cushion by stuffing fabric with batting or foam. Add any additional touches, such as a small blanket or a favorite toy, to make the bed inviting for your pet. Place the suitcase bed in a quiet, comfortable spot in your home, and watch as your furry friend enjoys their new upcycled haven.
Upcycling not only helps reduce waste but also allows you to add unique and personalized touches to your home. These projects are easy, fun, and a great way to get creative with items you might otherwise discard. Give these ideas a try and enjoy the satisfaction of creating something beautiful and functional while contributing to a greener planet.